
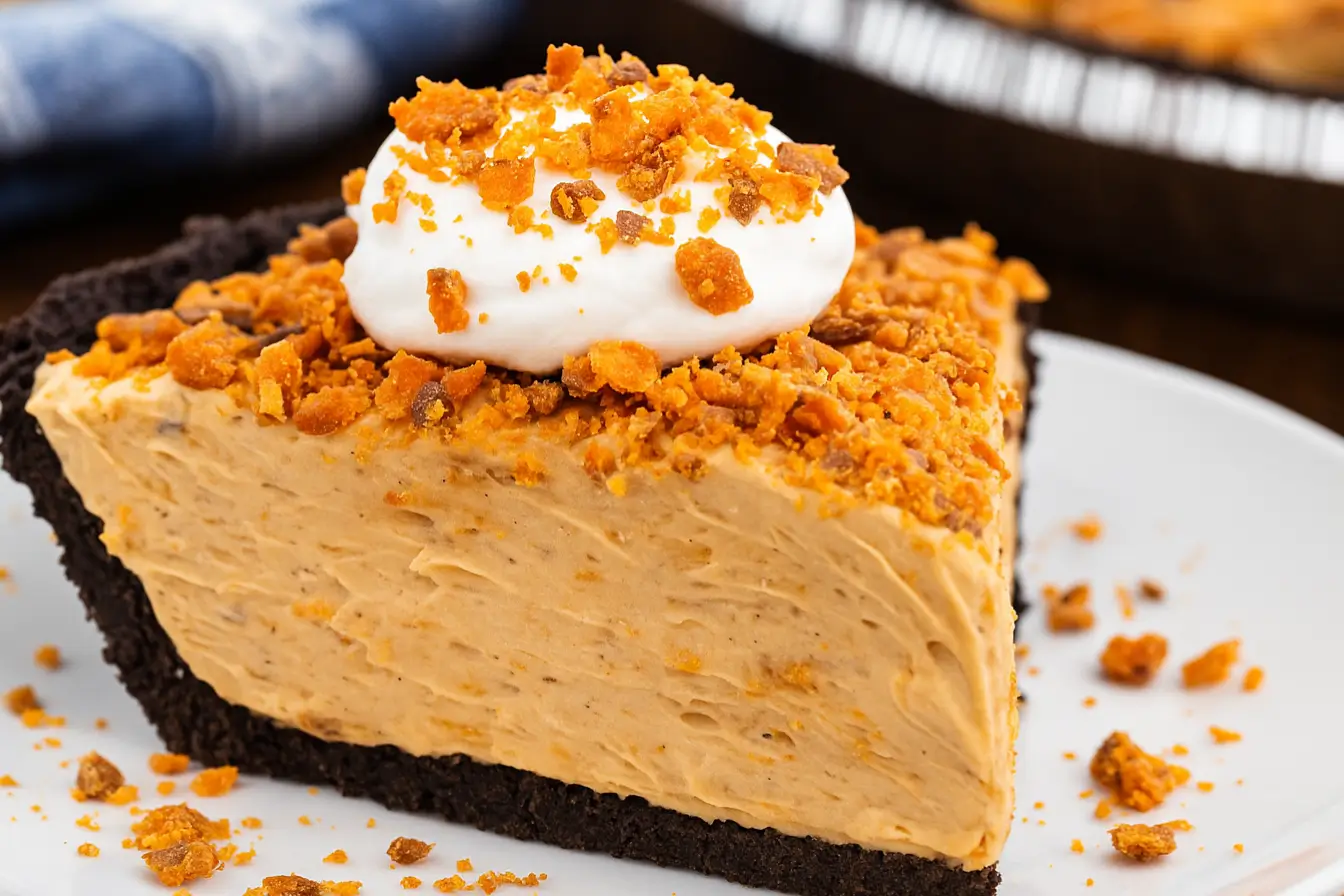
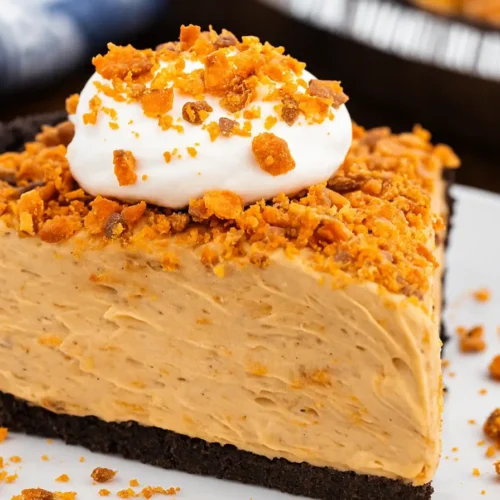
Let’s be honest: some desserts are made to impress, others are made to devour. This no-bake Butterfinger pie? It’s unapologetically the second kind. Crunchy, creamy, peanut buttery bliss — all wrapped up in a chilled, candy-studded slice of nostalgia. And the best part? You don’t even have to turn on your oven.
If you’ve ever found yourself with leftover Halloween candy (or, let’s be real, a stash of Butterfingers hidden “for the kids”), this pie is your golden ticket. It tastes like a mash-up of your favorite peanut butter cheesecake and an icebox pie, but with that unmistakable Butterfinger crunch woven through every bite.
With just a handful of pantry staples, zero baking required, and a prep time that barely breaks the 15-minute mark, this recipe is made for weeknights, holidays, or sweet cravings that just won’t wait.
Table of Contents
Ingredients You’ll Need for Butterfinger Pie
Essential Ingredients
- 8 oz cream cheese, softened
- 1/2 cup creamy peanut butter
- 1 cup powdered sugar
- 8 oz whipped topping (like Cool Whip), thawed
- 6–7 mini Butterfinger bars, crushed
- 1 pre-made chocolate or graham cracker pie crust
Optional
- 1/2 tsp vanilla extract
- Extra crushed Butterfinger + whipped topping for garnish
- Pinch of salt
Can I make it with homemade crust?
Absolutely. A homemade Oreo or graham cracker crust works beautifully and only takes 10 minutes. For a tender crust, follow these pie-crust temperature hacks from ICE.
How to Make Butterfinger Pie (Step-by-Step)
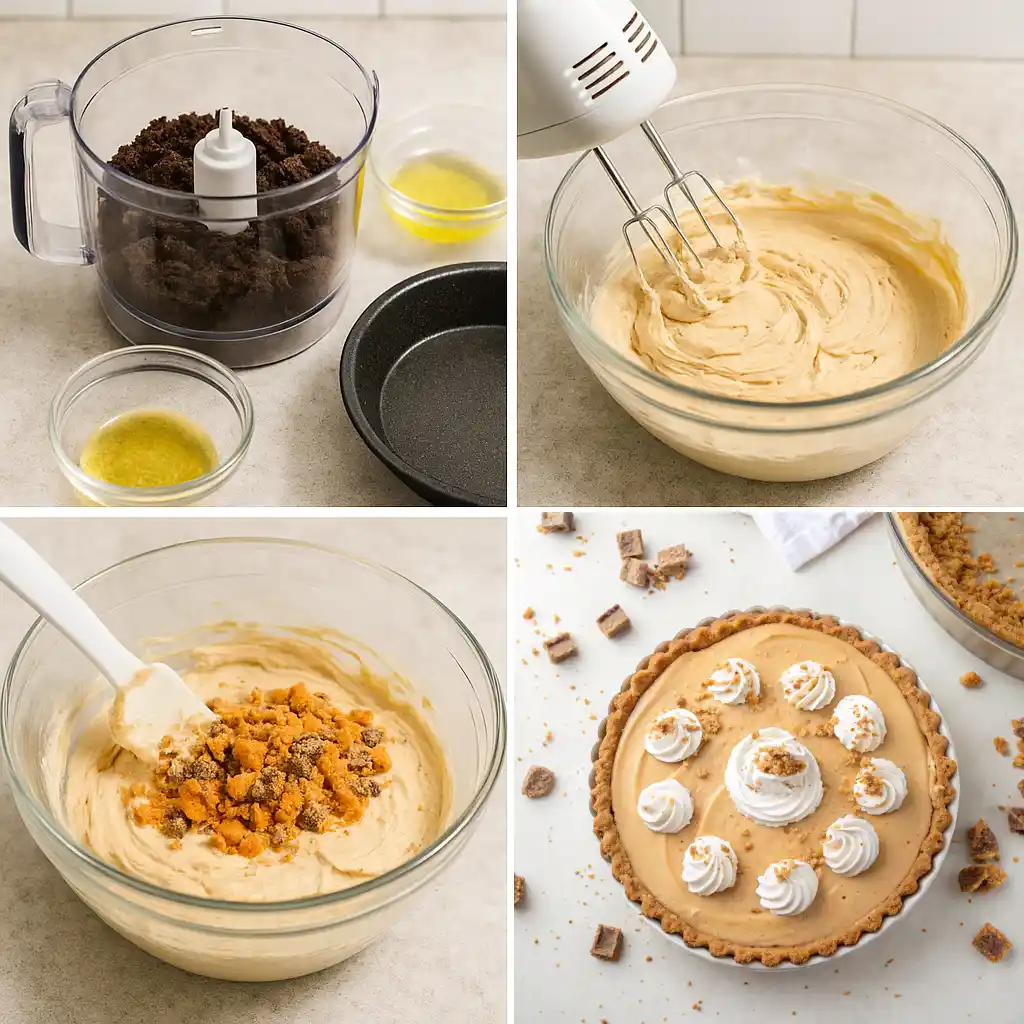
1. Start with the Crust
Use a store-bought crust or make your own with crushed cookies + melted butter.
2. Mix the Filling
Beat cream cheese and peanut butter until smooth. Add powdered sugar. Fold in whipped topping.
3. Add Butterfingers
Crush and fold in most of the candy. Save some for the top.
4. Assemble and Chill
Spread filling into crust, top with candy and whipped topping, then chill at least 2 hours.
Can I freeze Butterfinger pie instead of chilling?
Yes! Freeze for 1–2 hours for a firmer texture. Let sit 5–10 minutes before slicing.
Tips for the Perfect No-Bake Butterfinger Pie
- Use softened cream cheese for a smooth filling
- Don’t overmix the whipped topping
- Chill for at least 2 hours
- Use a mix of crushed + chunked candy
- Wipe your knife between slices for a clean cut
Want a whipped topping that stands tall longer? Learn how to stabilize whipped cream using trusted methods from King Arthur Baking.”
How do I prevent a soggy crust?
Chill a homemade crust or brush it with melted chocolate to seal it before adding filling.
Butterfinger Pie Variations You’ll Want to Try
1. Mini Butterfinger Pies
Perfect for parties using cupcake liners.
2. Swap the Crust
Try Nutter Butter, peanut butter cookie, or pretzel crusts.
3. Frozen Butterfinger Pie
Turn it into a frozen summer dessert.
4. Low-Sugar or Allergy-Friendly
Use sugar-free alternatives and nut butters as needed.
5. Holiday Remix
Layer with cheesecake filling and drizzle caramel for a holiday twist.
Looking to make the whipped topping last? Try adding instant pudding mix, a chef-approved shortcut to stabilize cream and keep it perky—even refrigerated overnight
Can I use other candy bars instead of Butterfinger?
Yes! Reese’s, Twix, or Snickers all work — or combine two.
Make-Ahead, Storage & Freezing Tips
Make-Ahead
Assemble 2 days ahead. Add final toppings right before serving.
Storage
Store covered in fridge for 4–5 days.
Freezing
Wrap tightly and freeze up to 1 month. Thaw in fridge overnight.
Will freezing affect the texture?
Slightly. Add fresh candy on top after thawing for best crunch.
Frequently Asked Questions About Butterfinger Pie
Can I use homemade whipped cream instead of Cool Whip?
Yes — stabilize it with powdered sugar for best texture.
Do I need to bake the crust?
No, unless making it from scratch — even then, chilling works.
Can I make this in a 9×13 pan instead of a pie dish?
Yes, double the filling and make it dessert-bar style.
What’s the best way to crush Butterfingers?
Refrigerate, then crush in a bag with a rolling pin for ideal texture.
Can I make it peanut-free?
Swap peanut butter for almond or SunButter and choose a different candy.
Nutrition Breakdown (Per Slice)
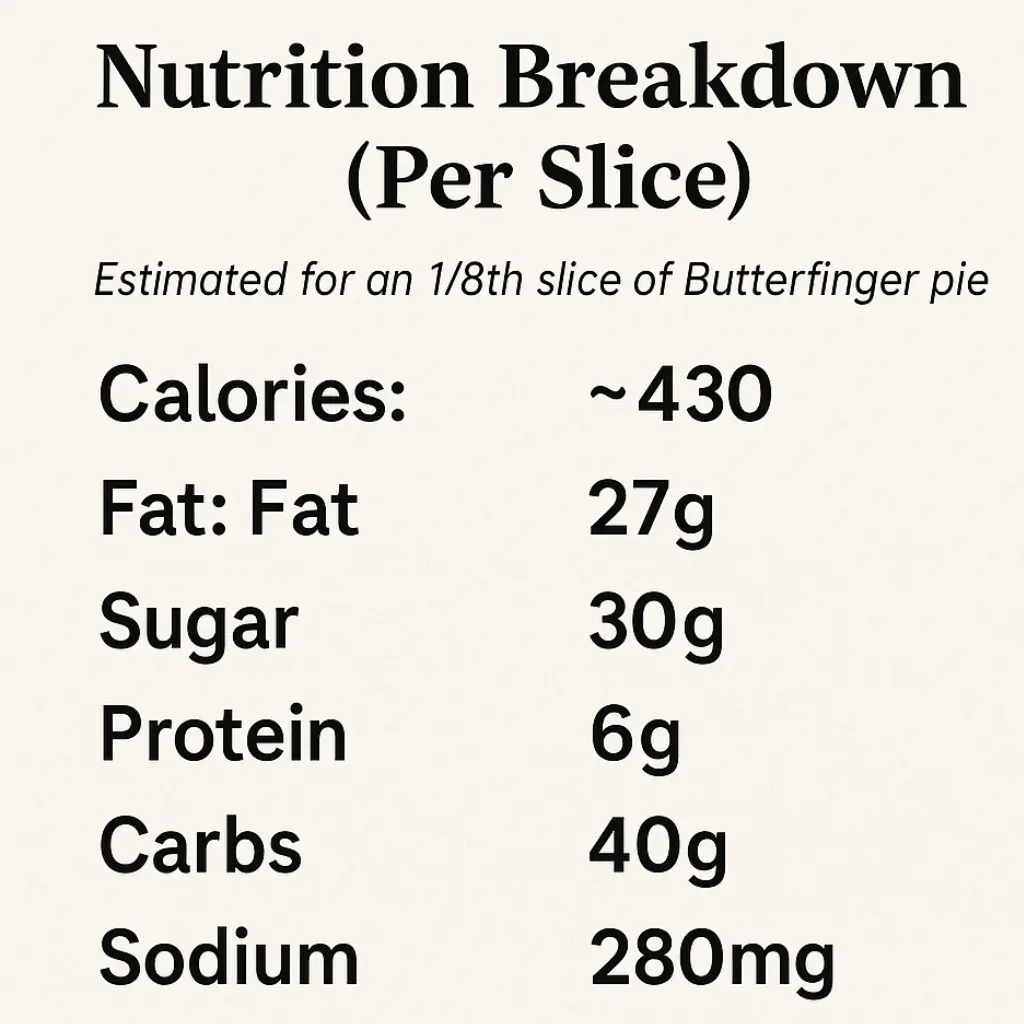
- Calories: ~430
- Fat: 27g
- Sugar: 30g
- Protein: 6g
- Carbs: 40g
- Sodium: 280mg
Is Butterfinger pie gluten-free?
Not by default — but can be made GF with crust and candy swaps.
Final Thoughts on This Easy No-Bake Butterfinger Pie
So, there you have it — the kind of dessert that disappears faster than you can say “just one more bite.” Whether you’re prepping ahead for a gathering or just in the mood for a candy bar–turned–pie miracle, this recipe delivers every single time.
It’s nostalgic, effortless, and endlessly customizable. If you try it, tag us or leave a comment — we’d love to see your version!
Easy No-Bake Butterfinger Pie
Equipment
- Mixing Bowl
- Electric hand mixer
- Spatula
- 9-inch Pie Dish
Ingredients
pre-made chocolate or graham cracker crust
- 8 oz cream cheese softened
- 1/2 cup creamy peanut butter
- 1 cup powdered sugar
- 8 oz whipped topping thawed
- 6-7 mini bars Butterfinger candy bars crushed
Crust
- 1 pre-made chocolate or graham cracker crust
Optional
- 1/2 tsp vanilla extract
- whipped topping for garnish
- extra crushed Butterfinger for topping
Instructions
- Step 1: In a mixing bowl, beat softened cream cheese and peanut butter until smooth.
- Step 2: Add powdered sugar and beat again until well incorporated.
- Step 3: Gently fold in whipped topping until the filling is fluffy and smooth.
- Step 4: Fold in most of the crushed Butterfinger candy, reserving some for topping.
- Step 5: Spoon the filling into your prepared crust. Smooth the top with a spatula.
- Step 6: Top with extra whipped topping and remaining crushed candy.
- Step 7: Chill for at least 2 hours before serving. Overnight is ideal.