
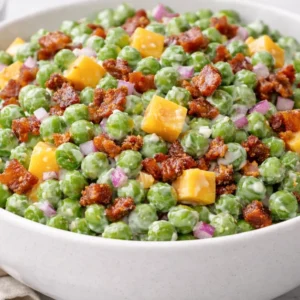
Classic Pea Salad is the ultimate retro comfort food that never goes out of style. Creamy, crunchy, and packed with savory bacon and sharp cheddar, it transforms humble frozen peas into the star of the table. While it is incredibly simple to make, the secret lies in using the right ingredients to avoid the soggy mess often associated with canned peas.
This guide focuses on honest, realistic cooking. You don’t need fancy equipment—just a few basics and an appetite for fresh goodness. Whether you are prepping for a summer barbecue or a holiday dinner, this reliable crowd-pleaser comes together in under 20 minutes and tastes even better the next day.
Table of Contents
Why You Will Love This Recipe
If you are looking for a side dish that is low-effort but high-reward, this is it. Here is why this recipe deserves a permanent spot in your rotation:
- Texture Heaven: This salad is all about contrast. You get the “pop” of the sweet peas, the smoky crunch of the bacon, the sharp bite of the onion, and the velvety smoothness of the creamy dressing in every single forkful.
- Budget-Friendly: A bag of frozen peas is one of the most affordable vegetables you can buy. Combined with pantry staples like mayo and onions, this salad feeds a large crowd for very little money.
- No “Active” Cooking: Apart from frying the bacon (which you can do in the oven to save mess), this is a chop-and-drop recipe. It keeps your kitchen cool in the summer.
- The Ultimate Potluck Companion: Because it contains no leafy greens, it doesn’t wilt. It sits perfectly alongside other hardy sides like a hot pot of Baked Beans.
Ingredients Notes
Great cooking starts with understanding your ingredients. Since this recipe uses very few items, the quality of each one matters significantly. Here is a deep dive into what you need:
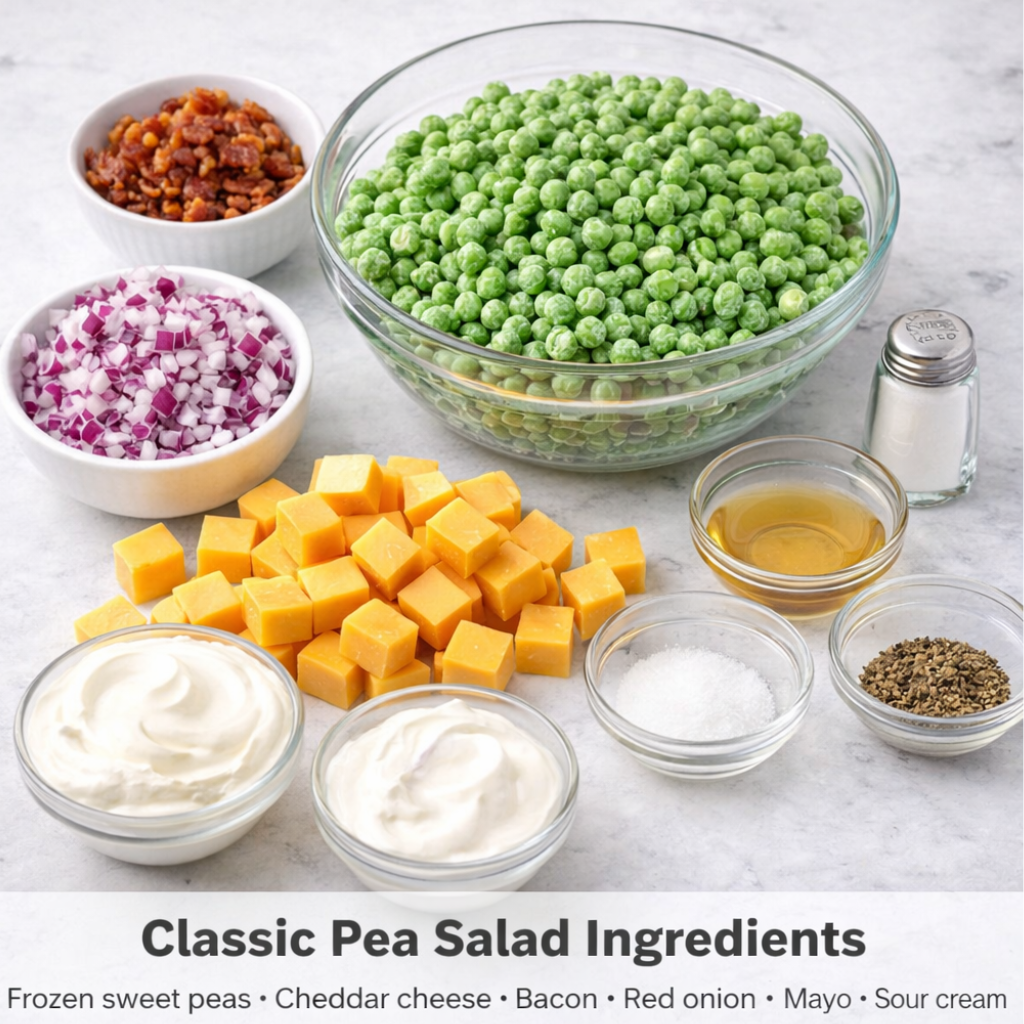
- Frozen Sweet Peas: This is the most critical component. Do not use canned peas. Canned peas are cooked inside the tin, which makes them soft, mushy, and metallic tasting. Frozen peas are flash-frozen at the peak of freshness. Once thawed, they retain a vibrant green color and a crisp, fresh snap that is essential for this salad.
- Bacon: You need a salty, smoky element to cut through the creamy dressing. Thick-cut bacon works best here as it holds its shape better once tossed in the dressing. Fry it until it is deep red and very crisp—chewy bacon can make the salad texture feel rubbery.
- Sharp Cheddar Cheese: Flavor matters here. A mild cheddar will get lost in the mayonnaise. Go for a Sharp or Extra Sharp Cheddar. Also, try to buy a block and cube it yourself. Pre-shredded cheese is coated in anti-caking agents (cellulose) that give it a powdery mouthfeel. Hand-cubed cheese provides a much better bite.
- Red Onion: Red onion provides a beautiful splash of purple color and a zesty crunch. It is slightly sweeter than yellow or white onions, making it more suitable for raw salads.
- The Dressing Base: We use a combination of Mayonnaise and Sour Cream. Using 100% mayonnaise can sometimes feel heavy and greasy. Substituting a portion with sour cream adds a tangy lightness that wakes up the palate.
- Seasoning:
- Apple Cider Vinegar: The acidity is needed to break the fat of the bacon and cheese.
- Sugar: Just a pinch highlights the natural sweetness of the peas.
- Black Pepper: Be generous with this; pepper pairs perfectly with bacon.
Step-by-Step Instructions
Follow these detailed steps to ensure you get the perfect consistency without the watery mess that ruins many pea salads.
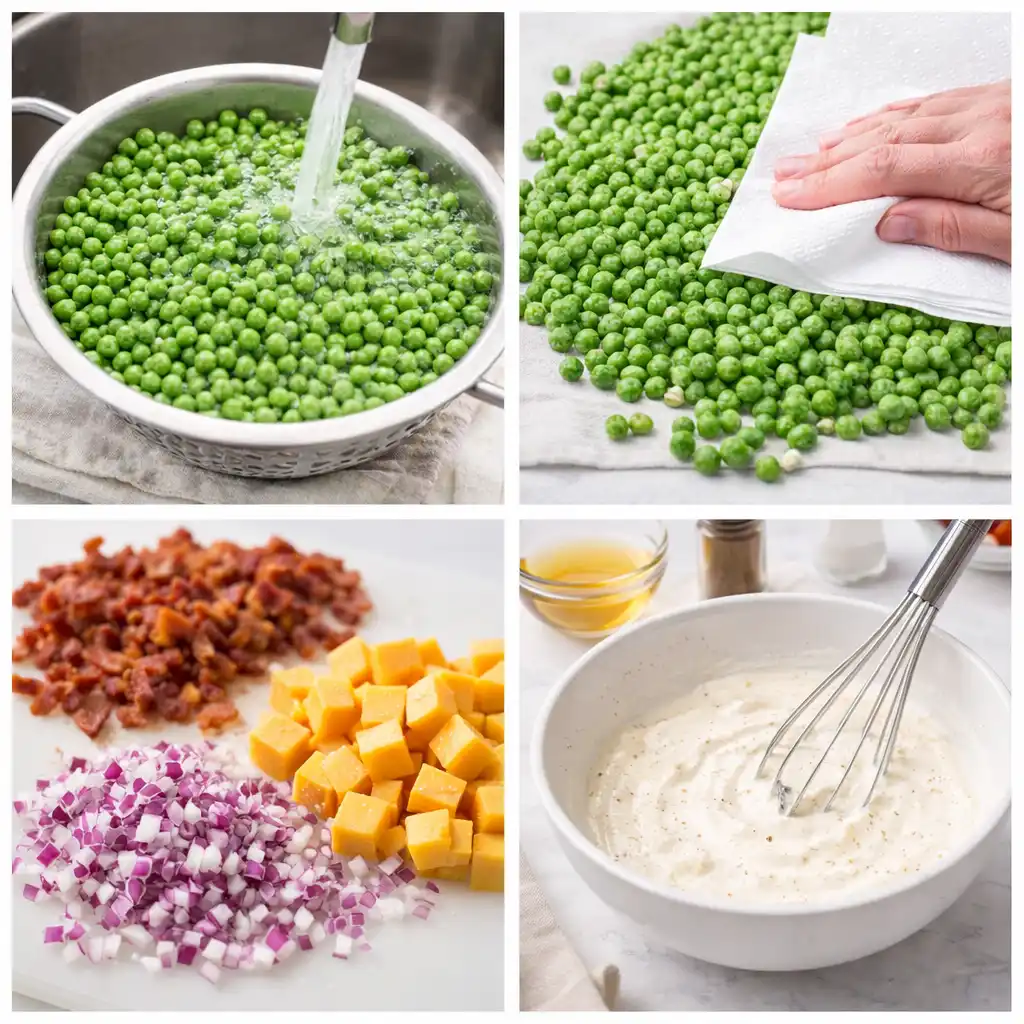
1. Thaw and Dry the Peas (The Most Important Step)
Take your bag of frozen peas and place them in a colander. Run cool water over them for a minute or two until they are no longer frozen. Alternatively, you can leave them on the counter for 45 minutes.
Once thawed, dry them thoroughly. Lay out a clean kitchen towel or a double layer of paper towels. Spread the peas out and pat them dry.
- Why do we do this? If the peas are wet, the water will mix with the mayonnaise, causing the dressing to slide off the veggies and pool at the bottom of the bowl as a watery soup. Dry peas equal a creamy coating.
2. Prepare the Mix-ins
While the peas are drying, cook your bacon. You can fry it in a skillet or bake it in the oven at 400°F (200°C) for 15 minutes for less mess. Once cooked, drain on paper towels and chop into small crumbles.
Next, sharpen your knife. Dice the red onion finely—you want small confetti-sized pieces, not large chunks. Cube the cheddar cheese into small pieces, roughly the same size as the peas (about 1/4 inch). This ensures every bite is balanced.
3. Mix the Dressing Separately
In a small bowl, whisk together the mayonnaise, sour cream, apple cider vinegar, sugar, salt, and freshly cracked black pepper.
- Pro Tip: Whisking the dressing separately before pouring it over the salad ensures the vinegar and spices are evenly distributed. If you dump everything in the big bowl at once, you might get a bite that is too salty or too vinegary.
4. Combine and Fold
Get a large mixing bowl. Add the dried peas, cheese cubes, diced onion, and about three-quarters of the bacon crumbles (save the rest for a pretty garnish). Pour the dressing over the ingredients.
Use a silicone spatula to fold the salad gently. Go from the bottom of the bowl to the top. Be careful not to mash the peas; you want them to stay whole and firm.
5. The Essential Chill
Cover the bowl tightly with plastic wrap or a lid. Place it in the refrigerator for at least one hour.
- Why wait? This rest period allows the dried onion to rehydrate slightly, softening its bite. It also allows the dressing to firm up and the flavors to meld together into a cohesive dish.
Expert Tips for Success
Here are some professional tips to help you master this simple dish:
- Tame the Onion: If you find raw red onion too sharp or spicy, or if you are serving guests who are sensitive to onions, try this trick: Soak the diced onions in a bowl of ice water for 10 minutes, then drain and pat dry. This washes away the sulfur compounds (the stuff that makes you cry) while keeping the crunch.
- Uniformity is Key: Try to cut your cheese cubes to be the same size as the peas. In the culinary world, this uniformity makes the dish easier to eat and much more visually appealing.
- Don’t Overdress: It is tempting to add more mayo, but start with the recipe amount. As the salad sits in the fridge, the salt pulls a tiny bit of moisture from the vegetables, which loosens the dressing. If you add too much mayo at the start, it might be runny by dinner time.
- Add a Twist: For a different flavor profile, try adding a tablespoon of fresh dill or swapping half the mayo for Ranch dressing. This pairs exceptionally well with the bacon.
Serving Suggestions
Classic Pea Salad is incredibly versatile. Because it is a cold, creamy side dish, it pairs beautifully with hot, savory mains. Here are some perfect menu combinations:
- The Comfort Food Feast: Pair the cool sweetness of the peas with the rich, savory sauce of Bourbon Chicken. The temperature contrast is delightful.
- The Lunch Combo: It makes a great side for a hearty sandwich. Serve a scoop alongside a hot Philly Cheesesteak for a diner-style lunch at home.
- Double the Sides: If you are hosting a large dinner, texture variety is important. Serve this soft, creamy salad next to crispy, hot Garlic Parmesan Potato Wedges.
- Holiday Tables: This is a standard side for Easter ham or roasted turkey, as the acidity and sweetness cut through the saltiness of cured meats.
Storage and Food Safety
One of the best features of this salad is how well it stores. In fact, many people prefer the taste on the second day.
- Refrigerator: Store leftovers in an airtight container in the refrigerator. It will stay fresh for 3 to 4 days. Note that the bacon may lose some of its crispiness over time, but the flavor will still be delicious.
- Freezing: Do not freeze this salad. Mayonnaise-based dressings separate and curdle when frozen and thawed, and the cheese will become crumbly and dry.
Safety Note: Because this recipe contains mayonnaise and dairy, it is temperature-sensitive. Do not leave it out at room temperature for more than two hours (or 1 hour if it is very hot outside). If serving at a picnic, place your bowl inside a larger bowl filled with ice. For detailed guidelines on how long to keep cold foods safe, check the official Cold Food Storage Charts to ensure you are serving safe meals.
Frequently Asked Questions
Based on common questions home cooks have about this dish, here are some answers to help you out.
Can you put frozen peas in a salad?
Yes, absolutely! In fact, for a cold salad like this, frozen peas are preferred over canned or fresh cooked peas. Frozen peas are blanched (briefly boiled) before freezing, so they are safe to eat once thawed. They provide a crisp texture that holds up well against the dressing, whereas canned peas turn into mush.
Do peas cause gas or bloating?
Legumes, including peas, can cause bloating in some people due to their fiber content and certain sugars. However, green peas are generally easier to digest than dried beans. To minimize this, ensure you rinse your thawed peas thoroughly before drying them. The smaller serving size of a rich salad like this also helps!
What is the healthiest salad you can eat?
While “healthy” is subjective, leafy green salads with vinaigrettes are typically lower in calories. Classic Pea Salad is a richer, more indulgent side dish due to the bacon, cheese, and mayonnaise. However, peas themselves are a nutritional powerhouse, packed with Vitamin A, Vitamin K, and protein. To make this salad lighter, you can swap the sour cream for Greek yogurt and use turkey bacon.
What is in a classic salad dressing for peas?
The traditional dressing is almost always a mayonnaise base. To balance the heaviness of the mayo, we add acid (vinegar or lemon juice), a dairy thinner (sour cream or milk), and seasoning (salt, pepper, and sugar). Some variations use Ranch dressing, but the classic vintage flavor comes from the mayo-vinegar-sugar trinity.
Classic Pea Salad
Equipment
- Large Mixing Bowl
- Colander
- Whisk
- Sharp knife
- Silicone Spatula
Ingredients
Salad Base
- 16 oz frozen sweet peas, thawed (do not use canned)
- 6 slices thick-cut bacon, cooked crisp and chopped cool completely before mixing
- 1 cup sharp cheddar cheese, cubed block cheese is best
- 0.33 cup red onion, finely diced see notes to mellow onion if desired
Creamy Dressing
- 0.5 cup real mayonnaise
- 0.25 cup sour cream or plain Greek yogurt
- 1 tbsp apple cider vinegar or fresh lemon juice
- 1 tsp granulated sugar optional, adjust to taste
- 0.5 tsp freshly cracked black pepper
- Salt to taste add at the end, bacon and cheese are salty
Instructions
- Thaw the Peas: Place the frozen peas in a colander and rinse under cool water until thawed.
- Dry Thoroughly: Spread the peas on paper towels or a clean kitchen towel and pat completely dry. This step prevents watery dressing and helps the salad stay thick and creamy.
- Prep Ingredients: Cook the bacon until very crisp, let it cool completely, then chop into crumbles. Finely dice the red onion and cube the cheddar into small, bite-size pieces.
- Make the Dressing: In a small bowl, whisk together the mayonnaise, sour cream, apple cider vinegar, sugar, and black pepper until smooth.
- Combine: In a large mixing bowl, add the dried peas, cheddar cubes, diced onion, and most of the bacon crumbles (save a little for topping).
- Fold: Pour the dressing over the salad mixture and use a spatula to fold gently until everything is evenly coated. Avoid over-mixing so the peas stay intact.
- Chill: Cover and refrigerate for at least 1 hour so the flavors meld and the dressing thickens slightly.
- Serve: Stir gently, taste and add salt if needed, then garnish with the remaining bacon crumbles before serving chilled.
Notes
- Tame the Onion: If raw red onion tastes too sharp, soak the diced onion in ice water for 10 minutes, then drain and pat dry before adding.
- Keep It Thick: Pat the peas very dry after thawing. Extra moisture is the main reason pea salad turns watery.
- Make Ahead: Mix everything except bacon up to 24 hours ahead. Add bacon right before serving for the best crunch.
- Storage: Refrigerate leftovers in an airtight container for up to 3 days. Do not freeze.
- Bacon Tip: Let bacon cool completely before mixing so it stays crisp and does not soften the dressing.


